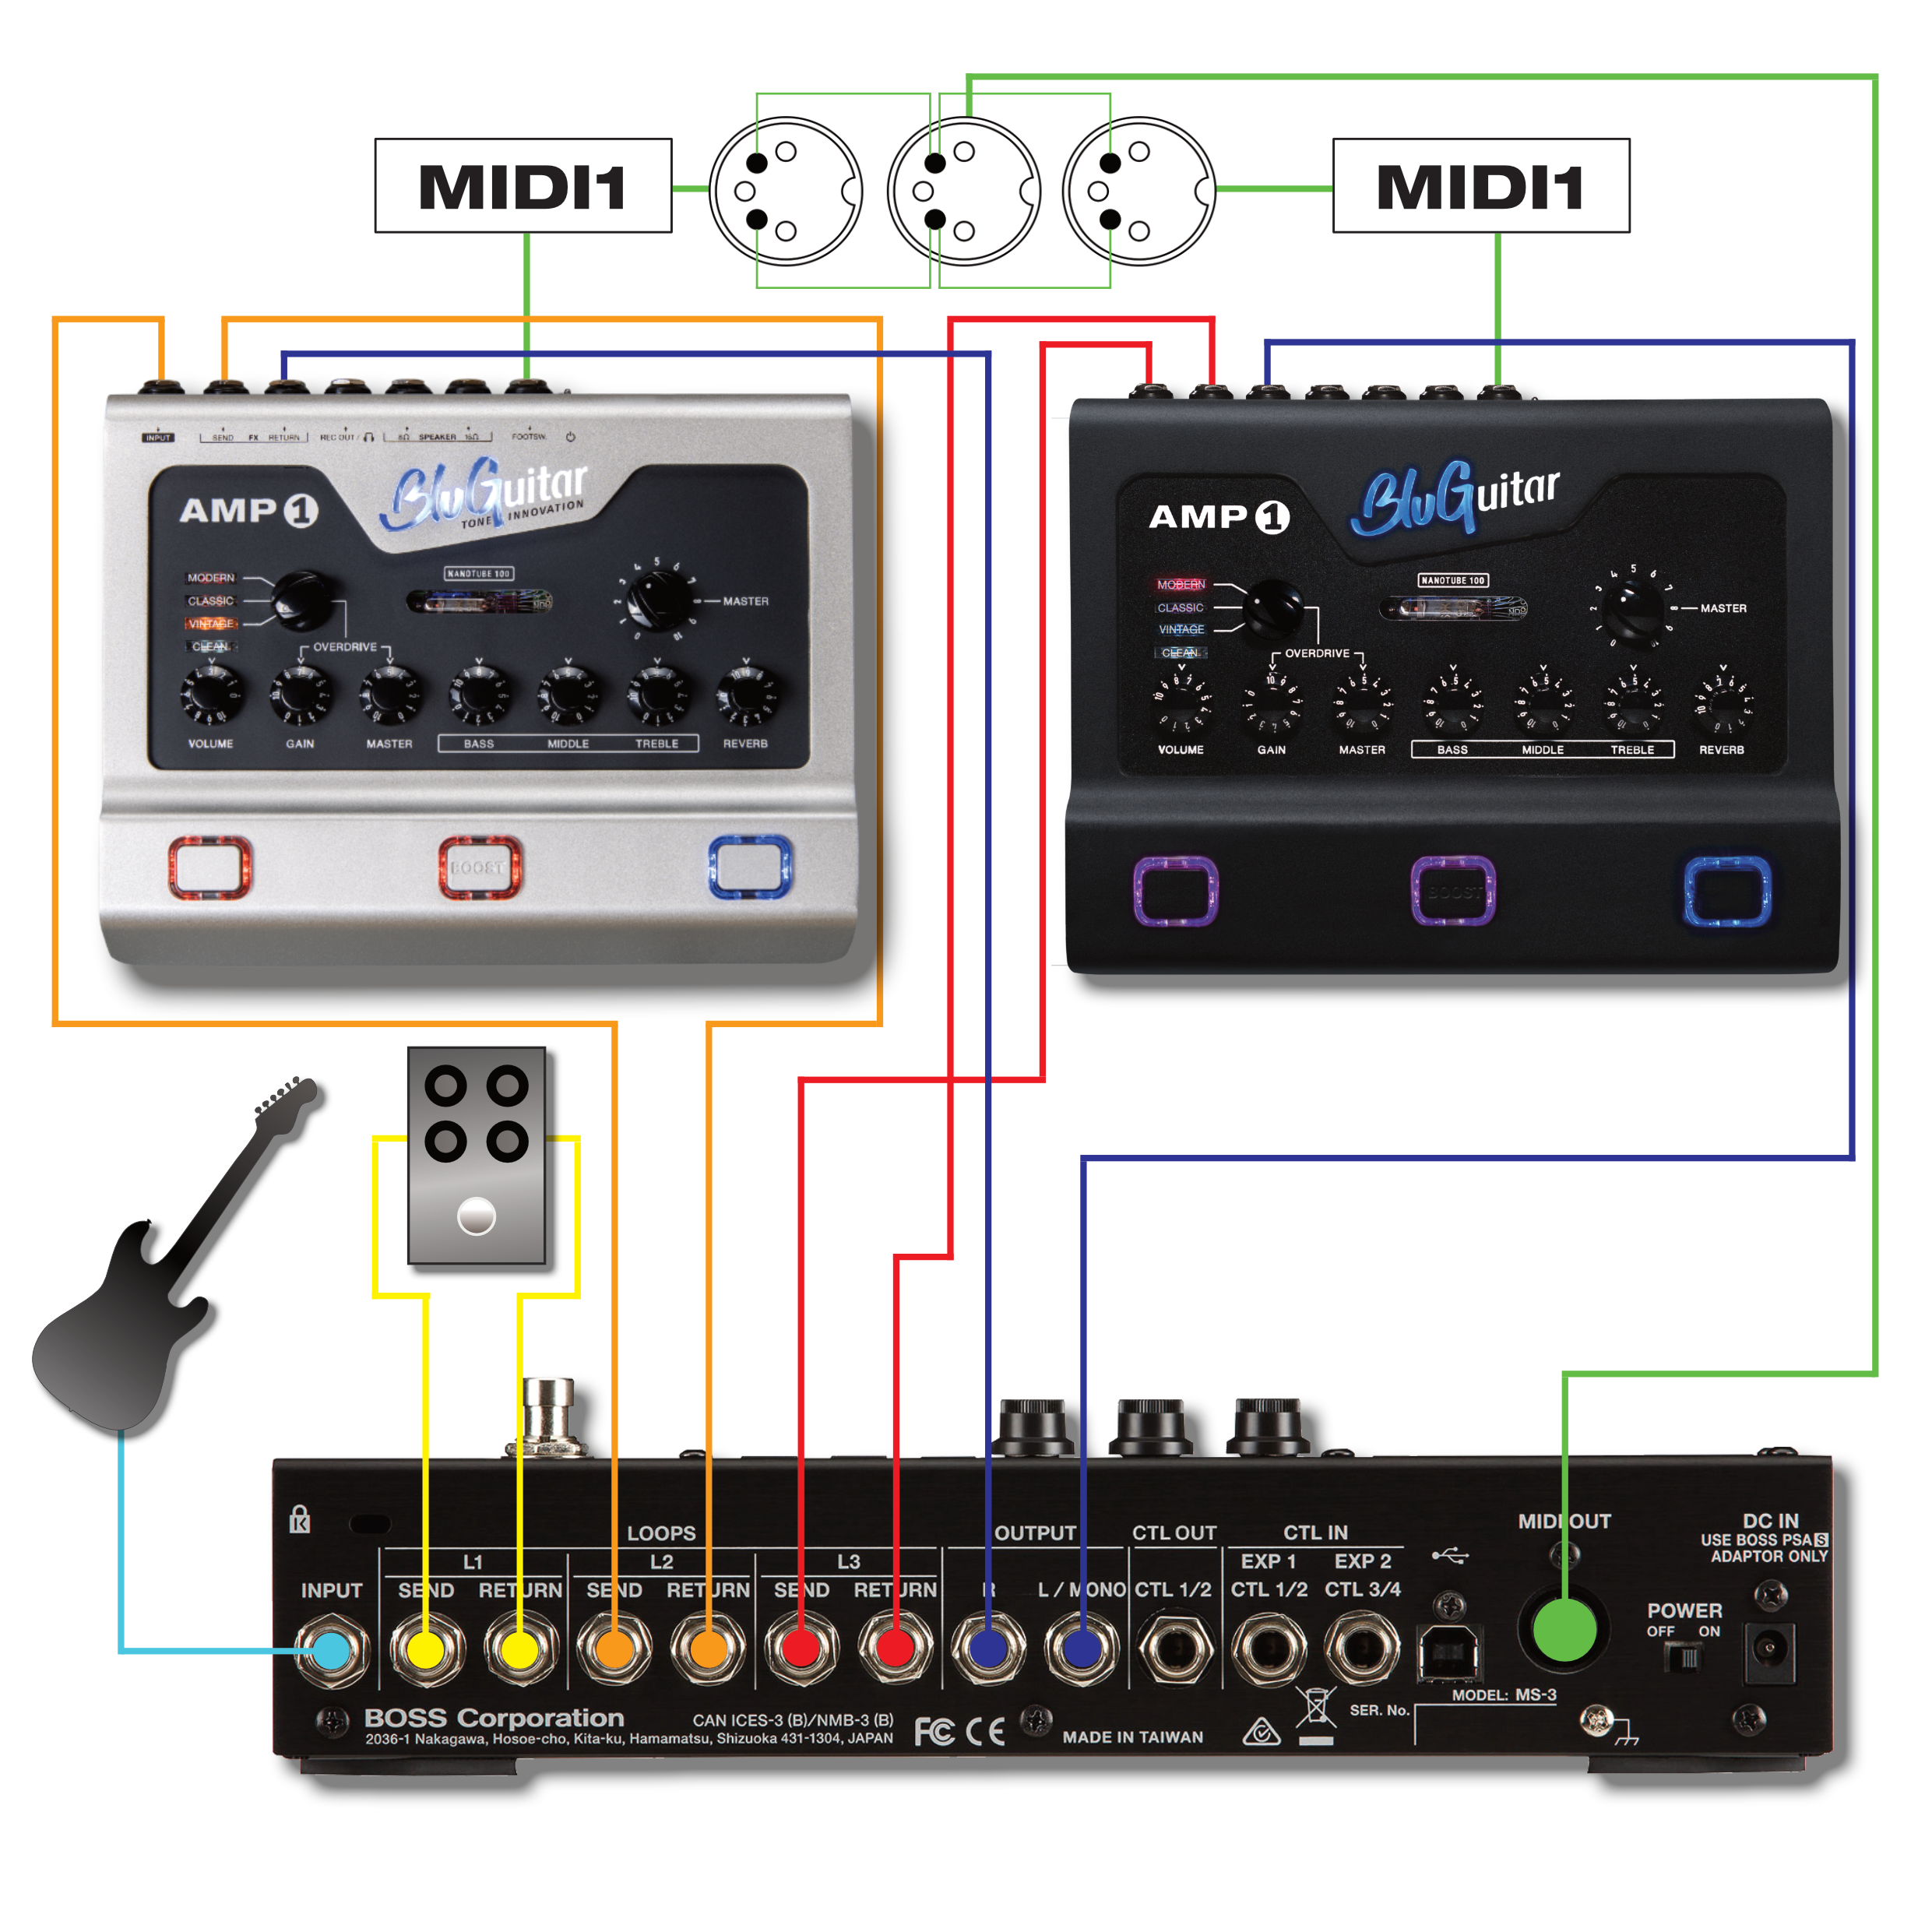
MIDI controlled stereo AMP1 system using the 7 cable method - a guide
In this article we will show you how to put together a stereo AMP1 system with multi-effects and make it controllable via MIDI. For maximum flexibility we have combined the two AMP1 models AMP1 Mercury Edition and AMP1 Iridium Edition.
Requirements
To build the most powerful and flexible rig with both AMP1 editions having access to all four channels on AMP1 Mercury Edition and AMP1 Iridium Edition, we need a loop switching device with a minimum of 2 FX loops. We used the BOSS MS-3 in this example, which provides 3 switchable loops plus MIDI switching functionality, as well as effects that can be used in 4 cable method.
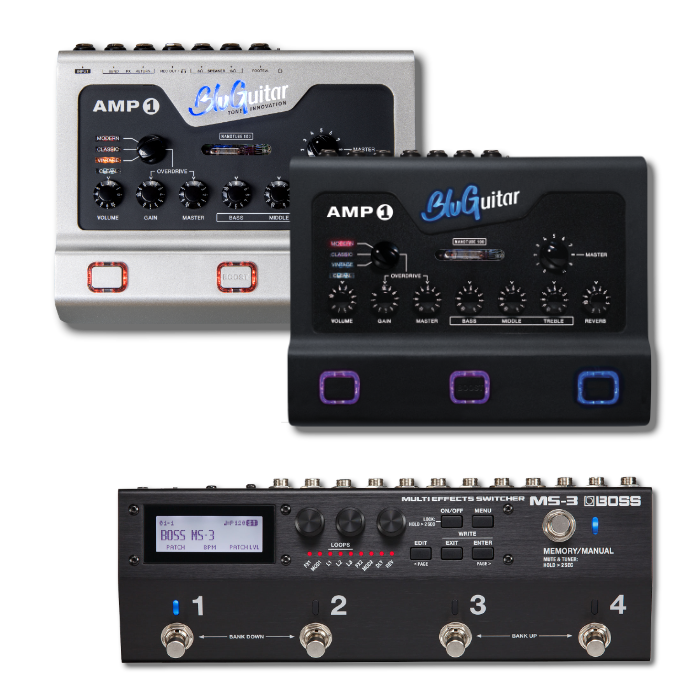 Photo source: boss.info
Connection and signal routing
The general setup of our rig is similar to that of the 4-cable method, in which we connect the pre FX of a multi-effects device in front of our amplifier and the post FX of the multi-effects device in the FX loop of the amplifier.
First, connect your guitar to the input of the MS-3:
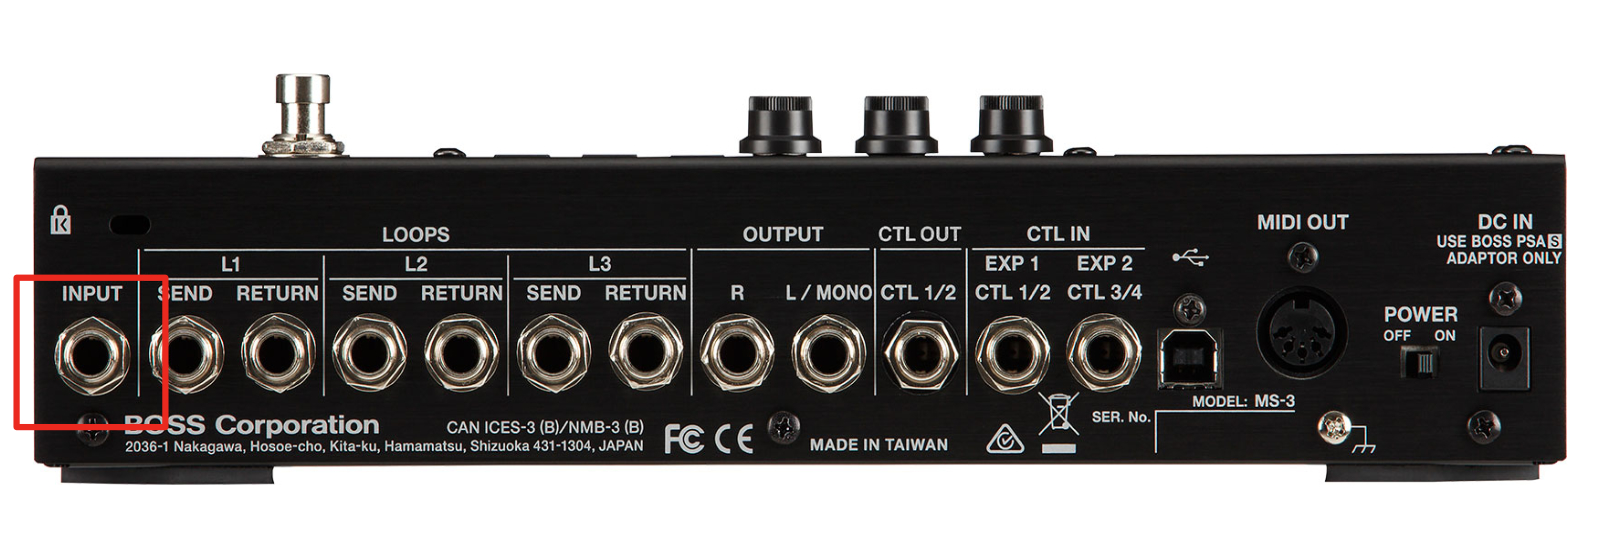 Photo source: boss.info
The three loops of the MS-3 cannot be separated from each other, and their order cannot be changed. We therefore place the two AMP1s in loops 2 and 3 so that we have the chance to put an additional pedal in front of the two amps.
In order to use a pedal of our choice in LOOP1, which can later be switched on and off via the MS-3, we connect the SEND of LOOP1 of the MS-3 to the INPUT of the pedal and the OUTPUT of the pedal to the RETURN of LOOP1 on the MS-3:
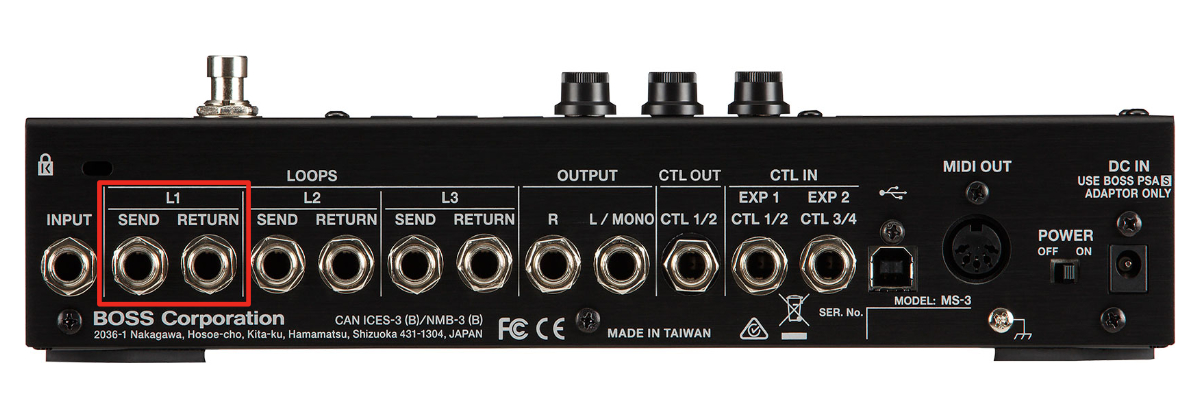 Photo source: boss.info
Then we connect the MS-3's SEND of LOOP2 to the INPUT of the AMP1 Mercury Edition and the AMP1 Mercury Edition's FX SEND to the MS-3's RETURN of LOOP2:
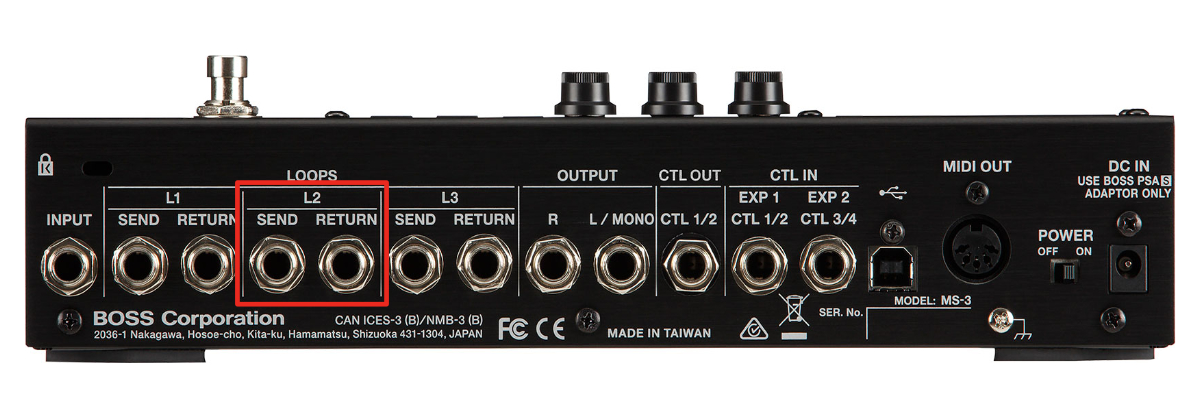 Photo source: boss.infoThen we connect the MS-3's SEND of LOOP3 to the INPUT of the AMP1 Iridium Edition and the AMP1 Iridium Edition's FX SEND to the MS-3's RETURN of LOOP3:
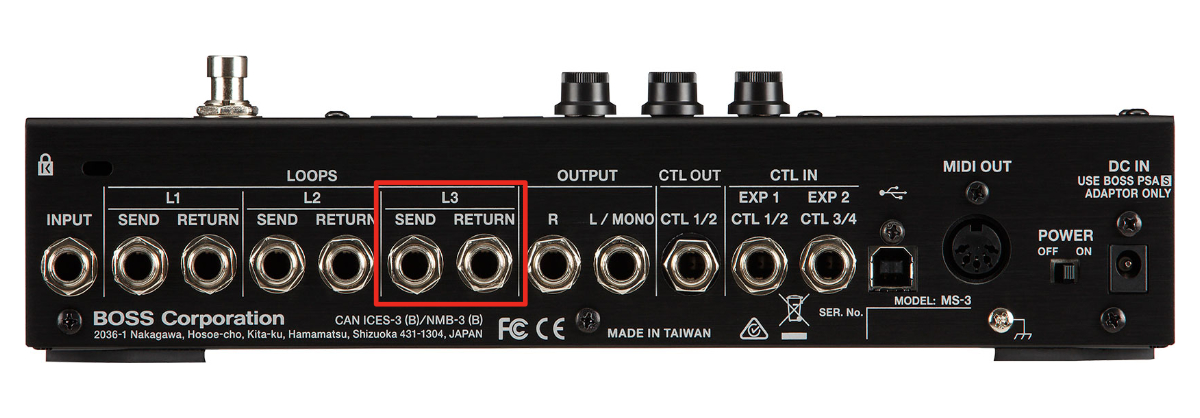 Photo source: boss.info
The stereo out on your MS-3 needs to be connected with the two AMP1’s for stereo power amping. Therefore connect the right OUTPUT of the MS-3 to the FX RETURN on your Mercury Edition, and the left OUTPUT of the MS-3 to the FX RETURN on your Iridium Edition:
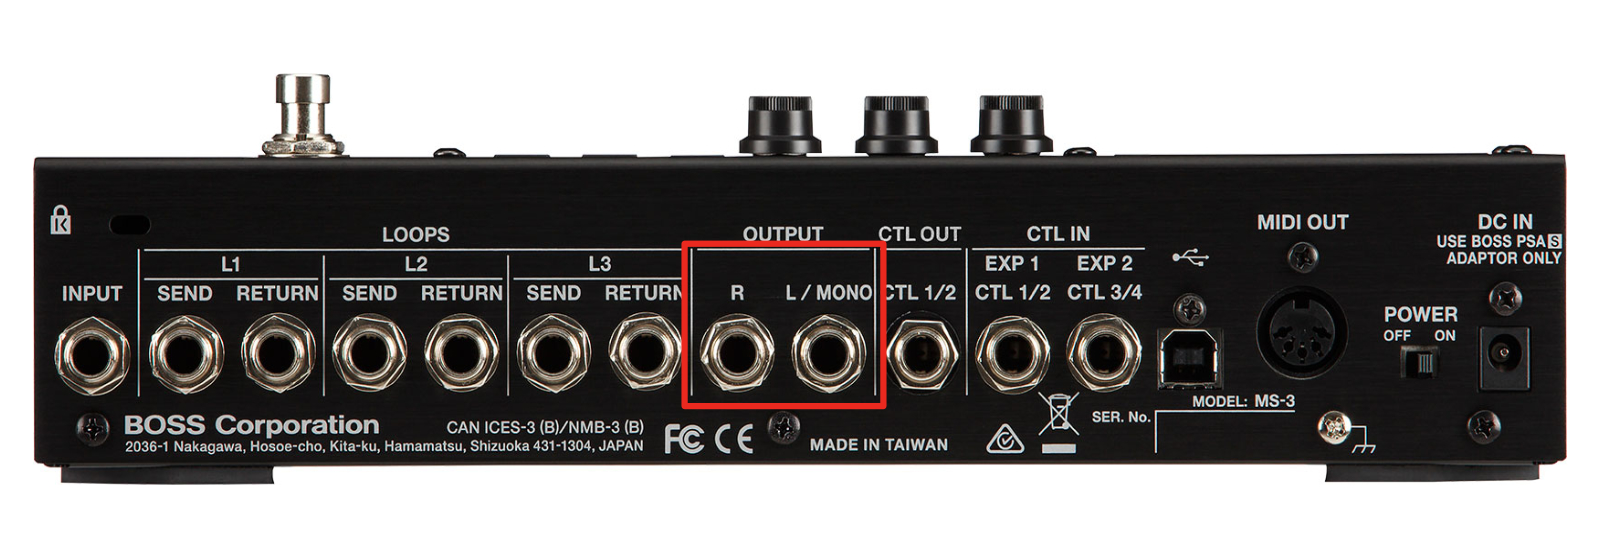 Photo source :boss.info
Mind that the two AMP1s have different sounding power amps: AMP1 Mercury Edition, is more mid-focused, whereas the AMP1 Iridium Edition delivers a signal with more low end. This effect sounds pretty cool as it widens the stereo image and enriches the overall frequency experience of your system.
Programming the system
While we want to use the power amps of both AMP1s to create a stereo image, we really want to avoid having the preamps of both AMP1s in the signal path. Why? Because the result would sound pretty ugly. ;) There simply would be too much gain and way too much treble.
The individual loops are activated in the MS-3. Therefore, when programming the MS-3, it is important that we only activate either LOOP2 (AMP1 Mercury Edition) or LOOP3 (AMP1 Iridium Edition). Please do not activate LOOP2 and LOOP3 at the same time.
If you have now activated either LOOP2 or LOOP3 (and additionally, if desired, also LOOP1 with our favorite pedal), you can, as with the 4-cable method, use the internal effects of the MS-3 for signal processing and combine them with the various switching options of the AMP1. Once you have created a sound you'd like to store, you can create a preset (called a "patch" in the MS-3) on the MS-3 in order to do so.
Your AMP1 must be connected to the MIDI OUT of the MS-3 using a MIDI cable and the BluGuitar MIDI1 adapter. Then you can use MIDI LEARN to assign the channel/boost/reverb combination set on the AMP1 to a specific MIDI PC command on the MS-3.
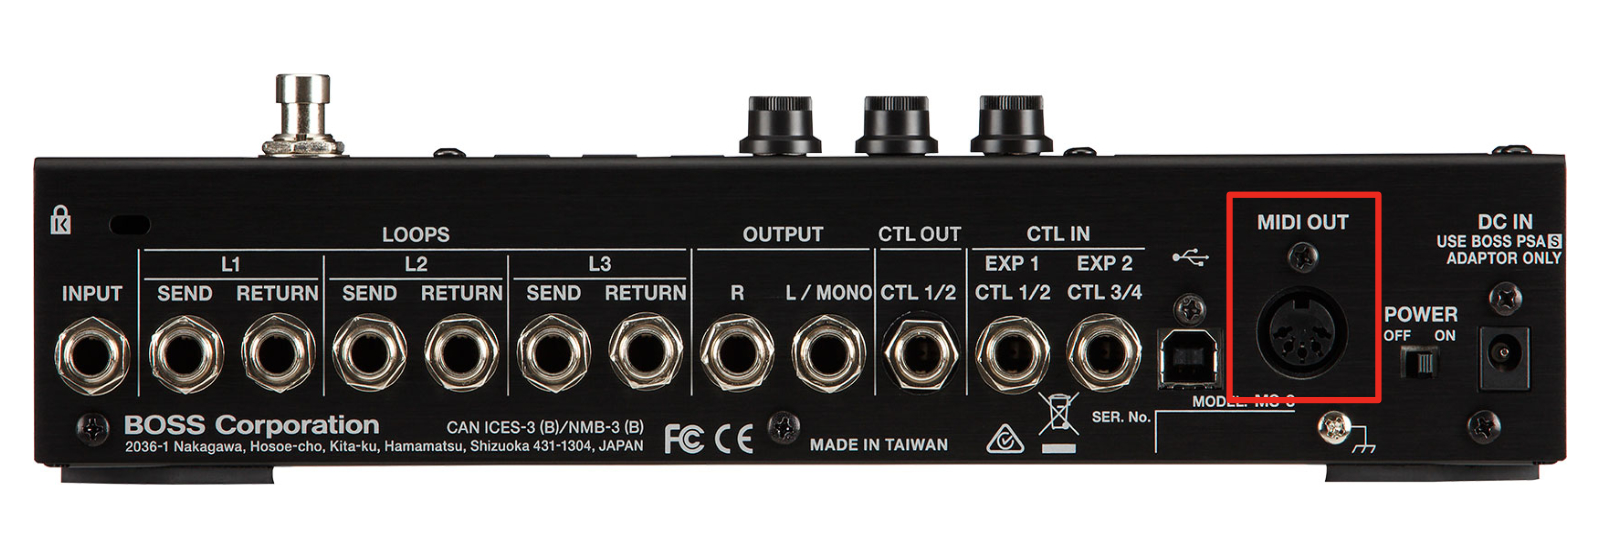 Photo source: boss.info
The MIDI setup
So at this point, a MIDI connection must be established between the MS-3 and the two AMP1s so that the MS-3 can communicate with the amps. Since we need to make a MIDI connection from the MS-3 to two amps, a special adapter is needed, that distributes the MIDI signal from the MS-3's MIDI OUT to two BluGuitar MIDI1 adapters.
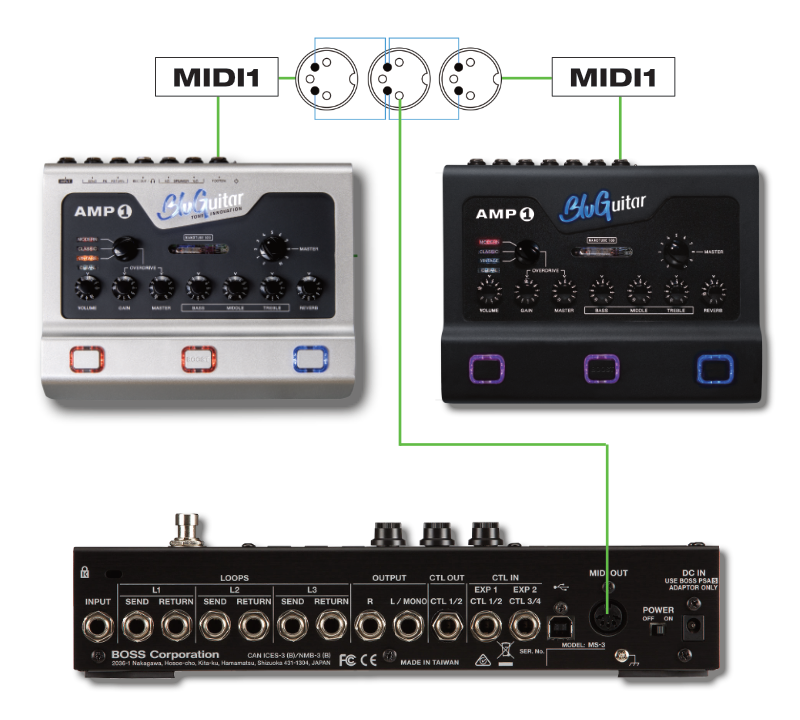
Matching adapter
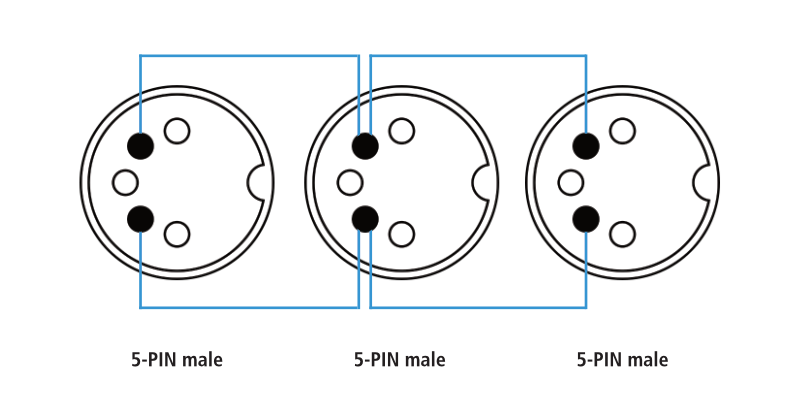
here are such adapters on the market, they are not very expensive and you could simply purchase one of them. The other option would be to make your own adapter. It’s not rocket science, but you have to know how to use a soldering iron, or you have to find a friend who can do it for you. The adapter is using three 5-pole male MIDI plugs. The MIDI signal is simply distributed from one plug into two plugs by wiring them in parallel:
Programming
With the help of the MIDI LEARN function of the AMP1, you can now assign each preset of the MS-3 to a specific channel of the AMP1, as well as the respective switching states of the internal boost (on/off) and the reverb (on/off). In addition, you can use MIDI CC commands to control the second master volume, the PowerSoak and the gain of your AMP1 individually with each preset (see here: Which parameters on the AMP1 can be controlled via MIDI Control Change (CC)?).
From our experience, it’s best to use as few MIDI commands as possible, meaning that you switch off anything MIDI-related that is not needed on your MS-3. This results in the fastest switching possible, as using too many MIDI commands is slowing down the switching speed.
The 7 cable method